How to Use Octopus Power Ups and Free Electricity Session JSON Objects in Home Assistant
Introduction to Octopus Power Ups and Free Electricity Sessions
Octopus Power Ups and Free Electricity Sessions don’t currently have official API support. Instead, you’re notified via email a day or so before a session starts, with details of the time slots. This works for most people, but what if you have a smart home with an electric car charger, an immersion heater, or a large battery coupled with your solar system? How can you automate charging or other energy-heavy activities during these free electricity periods?
To solve this, I’ve developed a set of Google Apps Scripts that scrape the email and convert it into a JSON list of objects, containing a datetime formatted string for each session’s start and end times. The JSON file is publicly available, hosted on GitHub’s infrastructure, and you can easily integrate it into Home Assistant.
You can learn more about how this works here: Octopus Power Ups API.
1. JSON Object Data Sources
The scripts I mentioned populate two JSON files, which are updated every hour at around 15 minutes past the hour:
The first file contains information about Power Ups, available only in certain parts of the UK (check this list). Note: You must still complete the form in the Octopus email to qualify for these sessions.
The second file details Free Electricity Sessions, which are available nationwide. Once you’re registered with Octoplus, you can participate without completing any additional forms.
Most of the time, these files will contain null values when no sessions are available. When a session is detected, the JSON file will update with a list of session objects. Here’s an example:
[{"start":"2024-09-14T12:00:00.000Z","end":"2024-09-14T13:00:00.000Z"}]
This list will contain up to three elements, sorted from soonest to latest. The entries are updated or removed within an hour after a session ends. Note that the start and end times are converted from local time to UTC. They are very easy to convert back to local time as you will see below.
2. Setting Up Home Assistant Sensors to Poll Data
To use this data in Home Assistant, you’ll need to create a REST sensor that polls the JSON file every 900 seconds (15 minutes). This sensor will extract the start and end times and make them available for use inside Home Assistant.
- First, ensure your
configuration.yamlincludes:sensor: !include sensors.yaml - Next, open your
sensors.yamlfile and add the following:
  - platform: rest
    name: "Power Up Times"
    unique_id: octopus_power_up_times
    resource: "https://www.whizzy.org/octopus_powerups/powerup.json"
    scan_interval: 900
    json_attributes_path: "$.[0]"
    json_attributes:
      - start
      - end
This sensor will update itself every 15 minutes and will remain silent if no session data is found.
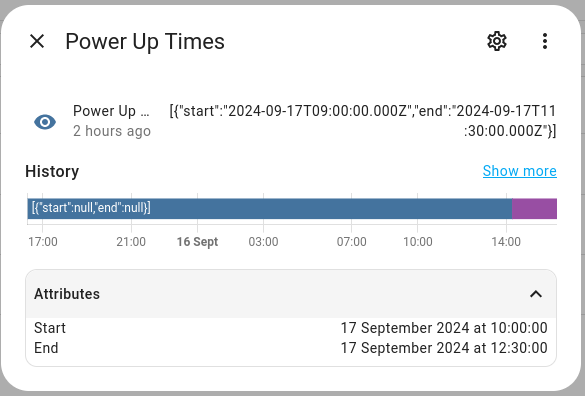
Once you have restarted Home Assistant you should find a new entity. Below you can see a screenshot which shows what happens when the sensor picks up a new Power Up session and changes from null to actual data:
3. Triggering an automation at the start of the session
Now that we have the session times in Home Assistant, let’s use them to create a dynamic binary sensor. This sensor will turn on when a session starts and off when it ends, making it perfect for triggering automations.
To add the sensor, update your configuration.yaml with the following template section:
template:
  - binary_sensor
    - name: "Power Up Session In Progress"
      state: >
        {% set n = now() | as_timestamp %}
        {% set st  = state_attr('sensor.octopus_power_up_times', 'start') | as_timestamp %}
        {% set end = state_attr('sensor.octopus_power_up_times', 'end')   | as_timestamp %}
        {% if n >= st and n < end %}
          True
        {% else %}
          False
        {% endif %}
template sensors use the Jinja2 script syntax.
This Home Assistant script creates a binary sensor called “Power Up Session In Progress” using the template platform. A binary sensor can only have two states: True (on) or False (off). Here’s a breakdown of what the script does:
Key Parts
state:
This defines the state of the binary sensor, and the state is calculated dynamically using a Jinja2 template.
The Logic in the Template
set n = now() | as_timestamp- This stores the current time (
now()) as a Unix timestamp (the number of seconds since January 1, 1970).
- This stores the current time (
set st = state_attr('sensor.octopus_power_up_times', 'start') | as_timestamp- This fetches the
startattribute from theoctopus_power_up_timessensor, which is a datetime string, and converts it into a timestamp.
- This fetches the
set end = state_attr('sensor.octopus_power_up_times', 'end') | as_timestamp- Similarly, this fetches the
endattribute from the same sensor and converts it into a timestamp.
- Similarly, this fetches the
- Conditional Logic:
if n >= st and n < end:
If the current time (n) is greater than or equal to the session start time (st) and less than the session end time (end), the state of the binary sensor is set toTrue, meaning the “Power Up Session” is in progress.- Otherwise, the sensor state is
False(i.e., not in progress).
Summary
- This binary sensor turns on (
True) if the current time is within the session’s start and end times (from theoctopus_power_up_timessensor). - It turns off (
False) when the current time is outside that range.
This sensor can be used to trigger automations based on whether a Power Up session is currently active or not.
4. Adding more information to the binary sensor
You can also extend the binary sensor to include additional attributes, such as the session’s duration and remaining time:
template:
  - binary_sensor
    - name: "Free Electricity Session In Progress"
      state: >
        {% set n = now() | as_timestamp %}
        {% set st  = state_attr('sensor.octopus_power_up_times', 'start') | as_timestamp %}
        {% set end = state_attr('sensor.octopus_power_up_times', 'end')   | as_timestamp %}
        {% if n >= st and n < end %}
          True
        {% else %}
          False
        {% endif %}
      attributes:
        duration_mins: >
          {% set st  = state_attr('sensor.octopus_power_up_times', 'start') | as_timestamp %}
          {% set end = state_attr('sensor.octopus_power_up_times', 'end')   | as_timestamp %}
          {{ ((end - st) / 60) | int }}
        duration_remaining: >
          {% if this.state == 'on' %}
            {% set n = now() | as_timestamp %}
            {% set end = state_attr('sensor.octopus_power_up_times', 'end') | as_timestamp %}
            {{ ((end - n) / 60) | int }}
          {% else %}
            {{ False }}
          {% endif %}
        start_time: "{{state_attr('sensor.octopus_power_up_times', 'start') | as_datetime }}"
        end_time: "{{state_attr('sensor.octopus_power_up_times', 'end') | as_datetime }}"
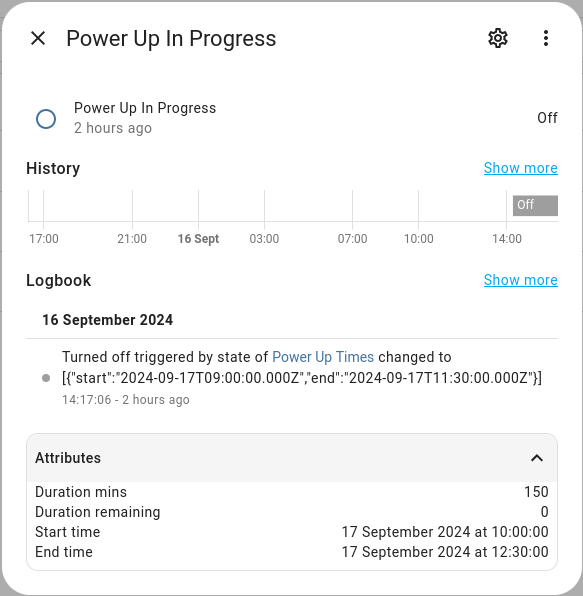
You can see the state section is the same, but we have added a new attributes section.
duration_minsconverts the start and end times to timestamps then subtracts one from the other and divides by 60. This gives us the duration of the session in minutes.duration_remainingcalculates the number of minutes fromnow()to the end of the session in minutes. Home Assistant will update this value every minute automatically for us. If the session is not currently active then it will return False instead.- Finally
start_timeandend_timeare parsed by Jinja and converted in to datetime format. This converts from the UTC datetime string in the JSON object in to a proper Home Assistant time zone aware datetime.
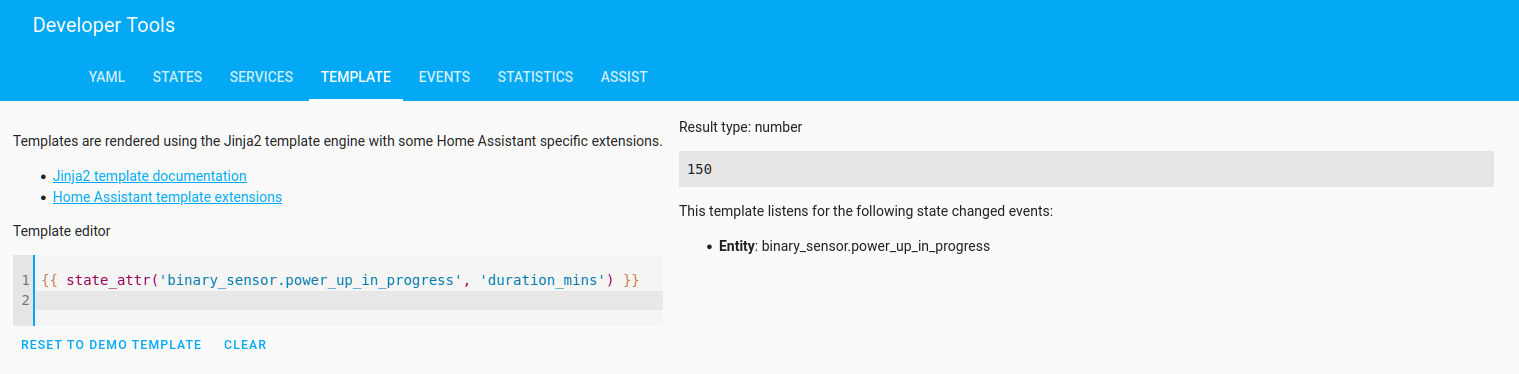
You can access these attributes in your own scripts by using the state_attr function. e.g.
{{ state_attr('binary_sensor.octopus_power_up_times', 'duration_remaining') }}
will return the number of minutes remaining in the current session. You can test this in the Home Assistant Developer Tools section, under “Template”.
5. Triggering your own automations
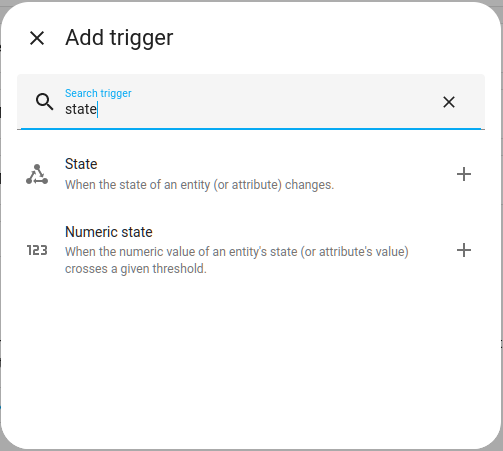
In order to trigger any of your Home Assistant automations you simply add a State trigger.
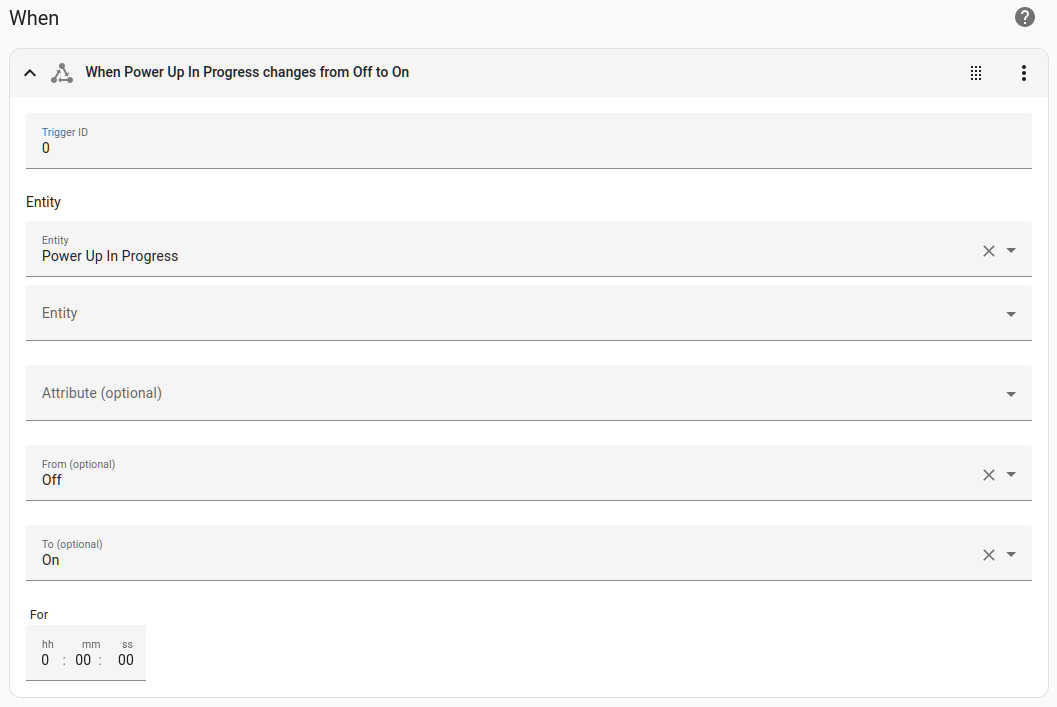
Choose the new sensor you created above and set the From to Off and the To to On. Any actions defined in that automation will be run when the sensor turns on at the start of the session. You can use a state change from On to Off to run a different automation at the end of the session.